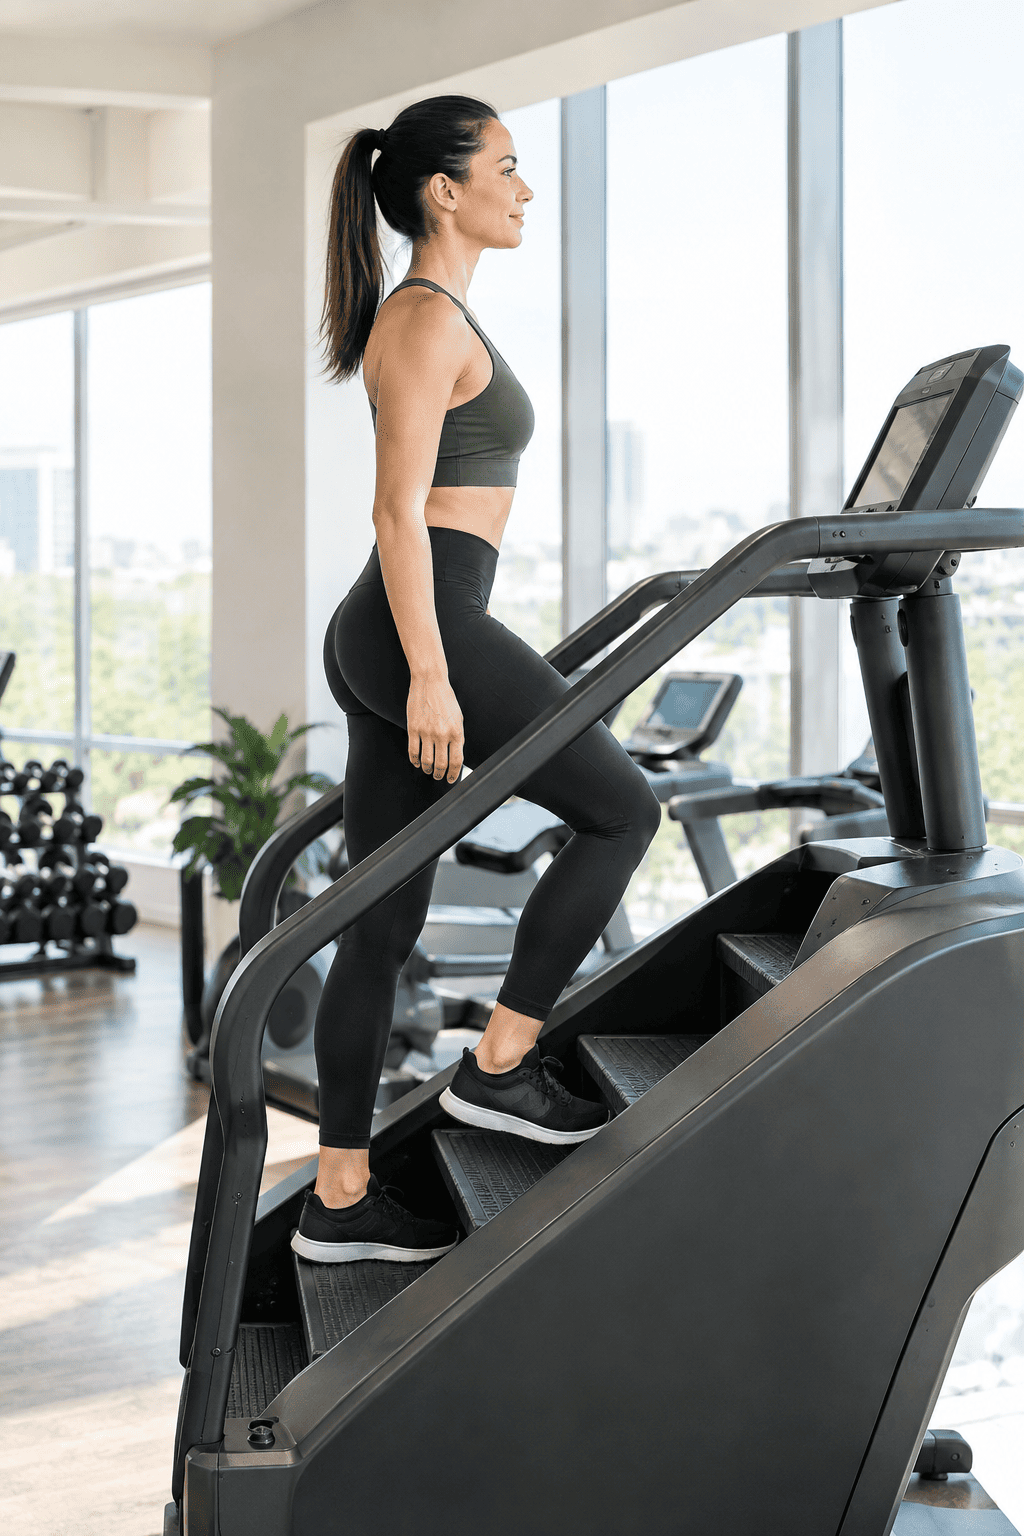
StairMaster Workout: 4 Beginner Plans and the Handrail Mistake
A good beginner StairMaster workout is 15 to 20 minutes at a steady level 4 to 6, with your hands off the rails and your body upright. That sounds almost too simple, but the machine punishes anything fancier until you have built up some base fitness, and the way you hold the rails changes the difficulty more than the level number does.
The first time I used a StairMaster I lasted about four minutes, and I spent three of them hanging off the handrails like I was leaning on a shopping trolley. I thought the machine was broken because the calorie number seemed low. It was not broken. I was holding so much of my body weight with my arms that my legs were barely working.
This guide covers what the levels actually mean, the handrail problem, four workouts you can use depending on your fitness, and how to fit the machine into a week without wrecking your legs.
At a glance
- Beginner session: 15 to 20 minutes at level 4 to 6
- Muscles worked: glutes, quads, hamstrings, calves, core
- The big mistake: leaning on the handrails
- How often: 2 to 3 times a week to start
- Good for: low-impact cardio, leg endurance, building a base
- Harder on: knees at very high levels, and calves in your first week
- Handy pairing: two StairMaster sessions plus two strength sessions a week
What a StairMaster actually does
A StairMaster is a machine with revolving steps that keeps producing a new stair to climb. Unlike a treadmill, where the belt carries your foot backwards, you have to lift your entire body weight up onto each step. That makes it closer to strength work for your legs than flat walking is, while still being cardio.
It is also low impact. There is no landing, no jarring through your knees and no pounding through your shins. For a lot of beginners, especially anyone carrying extra weight or coming back from a running injury, that combination of hard work and soft landings is exactly what they need.
There are a few different machines people call a StairMaster:
- The stepmill with real revolving stairs, which is what most people mean
- The stair stepper with two pedals that push down, which is easier and even lower impact
- Actual stairs in your building, which work surprisingly well if you have no gym
The workouts below are written for the stepmill, but I have included how to adapt them at the end.
Which muscles a StairMaster works
| Muscle | What it does on the machine |
|---|---|
| Glutes | Drive your body up onto each step, especially with a taller step |
| Quadriceps | Straighten the knee as you rise, and control the next step down |
| Hamstrings | Work with the glutes to extend the hip |
| Calves | Push through the ball of the foot at the top of each step |
| Core | Keeps you upright once you stop holding the rails |
If you take bigger, slower steps you feel it far more in your glutes. Quick, shallow steps shift the work towards your calves and quads and push your heart rate up faster. Neither is wrong. They are just two different sessions, and I use both.
What the levels mean, and where to start
The level number on a StairMaster sets the speed of the stairs, usually measured in steps per minute. The exact numbers vary by brand, but the general pattern is consistent.
| Level | Roughly | How it should feel | Who it suits |
|---|---|---|---|
| 1 to 3 | 25 to 45 steps per minute | Very easy stroll | Warm-up, first ever session |
| 4 to 6 | 45 to 65 steps per minute | Steady, can talk in sentences | Most beginner workouts |
| 7 to 9 | 65 to 80 steps per minute | Working hard, short sentences only | Intervals once you have a base |
| 10 to 12 | 80 to 95 steps per minute | Very hard, no talking | Intervals for fitter users |
| 13 and up | 95 plus | Sprint pace | Advanced only |
Start at level 4. If you can hold a conversation at level 4 for ten minutes without gripping the rails, move to level 5 next time. There is no prize for starting at level 10, and using a high level while hanging off the handrails is genuinely less work than a lower level done properly.
A useful gauge is effort rather than the number. On a scale of 1 to 10, steady work should sit around 5 or 6. If you want to be more precise, the target heart rate calculator gives you a range to aim for.
The handrail mistake that changes everything
This is the single biggest thing to fix, so it gets its own section.
When you lean your forearms on the rails or grip them and pull, your arms support part of your body weight. Since the entire point of the machine is lifting your body weight up each step, taking weight off your legs makes the workout dramatically easier while the display keeps showing the same level and a flattering calorie number.
What good form looks like:
- Stand tall. Shoulders over hips, chest open, eyes forward rather than down at your feet.
- Hands off, or fingertips only. Let your arms swing naturally, the way they would on real stairs.
- Touch, do not grip. If you need the rails for balance, rest your fingertips lightly rather than wrapping your hands around them.
- Full foot on the step. Heels down where you can, not just toes.
- Do not hunch forward. Leaning into the console rounds your back and shifts work away from your glutes.
Here is the honest test. Drop the level until you can go hands free, upright, for the whole session. That number is your real starting level. For most beginners it is two or three levels lower than the one they were using while leaning, and the session immediately feels more useful.
If you genuinely need the rails for balance, that is fine and it is safer than wobbling. Use a light fingertip touch, keep the level low, and work on standing unsupported for a minute at a time. Balance improves quickly.
Warming up and cooling down
Two to three minutes at level 1 to 3 is enough before a steady session. Before an interval session, give yourself five minutes and include a minute or two at a moderate level so the first hard interval is not a shock.
Afterwards, keep stepping at the lowest level for two minutes rather than stopping dead. Stair climbing sends a lot of blood to your legs, and stepping off suddenly can leave you feeling lightheaded. A few of the moves in my beginner stretching routine feel very good on tired calves afterwards.
Four StairMaster workouts
Workout 1: The first session (15 minutes)
For your first few visits. The only goal is to finish comfortably with your hands off the rails.
| Time | Level | Notes |
|---|---|---|
| 0 to 3 min | 3 | Warm-up, find your rhythm |
| 3 to 12 min | 4 to 5 | Steady, able to talk |
| 12 to 15 min | 2 to 3 | Cool-down |
If nine minutes at level 4 feels like too much, split it: three minutes on, one minute at level 2, repeated. That is a completely legitimate way to start.
Workout 2: Steady climb (25 minutes)
Once the first session feels easy. This is the bread and butter session, and the one I do most weeks.
| Time | Level | Notes |
|---|---|---|
| 0 to 3 min | 3 | Warm-up |
| 3 to 22 min | 5 to 6 | Steady, conversational, hands off |
| 22 to 25 min | 2 | Cool-down |
Steady work like this builds your aerobic base, and it is far more valuable for beginners than people realise. My guide to steady state cardio explains why it deserves more of your week than the hard stuff.
Workout 3: Beginner intervals (20 minutes)
Add this once you can do 20 minutes steady without struggling. It is the StairMaster version of the interval idea in my beginner HIIT workout.
| Time | Level | Notes |
|---|---|---|
| 0 to 4 min | 3 to 4 | Warm-up |
| Then 6 rounds | Alternate | 1 min at level 7 to 8, then 90 seconds at level 3 to 4 |
| Last 3 min | 2 to 3 | Cool-down |
Change the level with the arrows while you keep stepping. Do not jump off the machine between intervals. If your later intervals get noticeably weaker, make the recovery two minutes instead of ninety seconds.
Workout 4: The pyramid (30 minutes)
A nice way to make a longer session pass quickly. The level climbs, then comes back down.
| Minutes | Level |
|---|---|
| 0 to 3 | 3 |
| 3 to 7 | 4 |
| 7 to 11 | 5 |
| 11 to 15 | 6 |
| 15 to 19 | 7 |
| 19 to 23 | 5 |
| 23 to 27 | 4 |
| 27 to 30 | 2 |
If level 7 is too much at this stage, shift the whole pyramid down a couple of levels. The shape of the session matters more than the numbers.
How to feel it more in your glutes
If you want the machine to do more for your legs and backside, small tweaks make a big difference. Do these for a minute or two at a time inside a steady session rather than for the whole workout.
- Skip a step. Take every second stair at a lower level. Big range, slow cadence, strong glute work. Only do this if your balance is solid.
- Slow the level and push through the heel. Feel the whole foot press down rather than bouncing on your toes.
- Stand tall. Leaning forward takes the glutes out of it almost entirely.
- Skip the cross-overs and side steps. You will see them on social media. They look impressive, they are easy to trip on, and they are not necessary.
For proper glute strength work, the machine is a supplement rather than the main event. Exercises like those in my upper glute exercises guide and hip thrusts at home do more.
How long and how often
| Stage | Session length | Times per week |
|---|---|---|
| First two weeks | 15 minutes | 2 |
| Weeks 3 to 6 | 20 to 25 minutes | 2 to 3 |
| After that | 25 to 40 minutes, or 20 minutes of intervals | 2 to 4 |
Your legs will tell you if you have done too much. Stair climbing creates a surprising amount of muscle soreness at first, particularly in the calves and the front of the thighs, so leave a day between your first few sessions. My guide to reducing muscle soreness covers what actually helps if you overdo it.
Using the StairMaster to lose weight
The StairMaster burns energy at a good rate because you are lifting your body weight repeatedly, and the heavier you are, the more it costs you. That said, no machine burns fat by itself, and the calorie readout on the console is an estimate that tends to run high.
What works, in the order that matters:
- Total weekly activity. Two or three StairMaster sessions plus daily walking beats one heroic session.
- What you eat. A 25-minute climb is easily cancelled out by a snack afterwards.
- Strength training. Keeping muscle while you lose fat changes how the end result looks.
- Consistency over months. Not weeks.
For a more realistic calorie figure than the console gives you, the calories burned calculator uses your weight and the length of the session. The broader plan in my home workout for weight loss guide applies here too.
StairMaster vs treadmill incline vs flat walking
| StairMaster | Treadmill incline walk | Flat treadmill walk | |
|---|---|---|---|
| Impact | Low | Low | Low |
| Leg muscle demand | High | Moderate to high | Low |
| Heart rate for the effort | High | Moderate | Lower |
| Ease for beginners | Moderate | Easy | Very easy |
| Boredom factor | High, sessions feel long | Moderate | Moderate |
If the StairMaster feels like too much right now, incline walking is the gentler cousin and gets you most of the way there. The 12-3-30 workout is the popular version of that, and it makes a good stepping stone. If you have no gym at all, walking for weight loss is where I would start.
Common StairMaster mistakes
- Leaning on the rails. Covered above, and worth repeating because almost everybody does it.
- Starting at too high a level. Pride is not a training variable.
- Looking down at your feet. Rounds your back and strains your neck.
- Tiny toe taps. Half-stepping on your toes hammers your calves and skips the glutes.
- Holding your phone in both hands. Same problem as the rails, plus a trip risk.
- Stepping off suddenly at the end. Cool down for a couple of minutes.
- Doing it every single day at the start. Your calves will let you know.
Is the StairMaster bad for your knees?
For most healthy knees, no. It is low impact, and the movement is similar to climbing stairs at home, which is a normal daily activity. Some people find it more comfortable than running or even brisk walking.
There are caveats worth knowing. High levels with very fast, shallow steps can irritate the front of the knee, especially if you are leaning forward. Deep skip-a-step climbing loads the knee more too. If you get knee pain, drop the level, stand taller, take normal-sized steps and shorten the session. If it persists, get it looked at rather than pushing through.
If knees are a known issue for you, the options in my low-impact workout for beginners guide give you plenty of alternatives.
No gym? Use real stairs
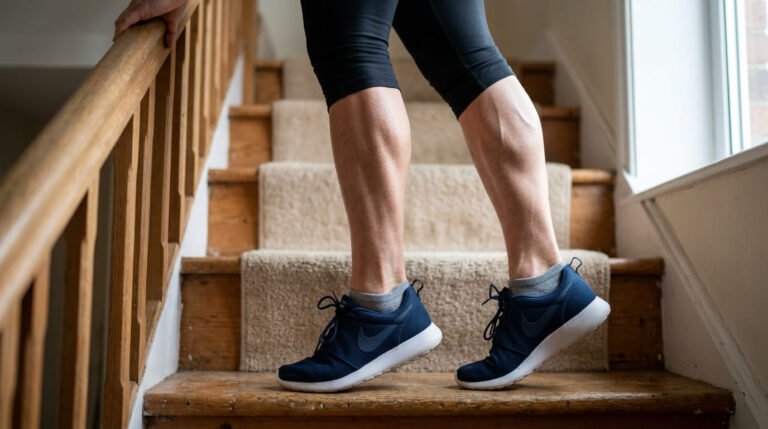
You do not need the machine. Real stairs work, with two differences: there is a descent, which adds impact and some soreness, and you have to turn around a lot.
A simple home stairs session:
- Walk up at a steady pace, walk down carefully. Repeat for 10 minutes.
- Build to 15 or 20 minutes over a few weeks.
- For intervals, go up quickly, walk down slowly as your recovery, and repeat 8 to 10 times.
Hold the rail on the way down if you need to. Descending is where people trip, and it is also what makes your quads sore for two days afterwards. Add some moves from my beginner leg workout at home and you have a complete lower body session with no equipment at all.
How to tell you are actually improving
The StairMaster is unusually good for tracking progress, because the machine gives you numbers and the numbers are hard to fudge once your hands are off the rails. Write down three things after each session: the level you held, the minutes, and your effort out of 10.
Progress shows up in this order for most people:
- The same session feels easier. Level 5 for 20 minutes goes from a 7 out of 10 to a 5 out of 10. This usually happens within three or four weeks.
- You can hold a higher level. Level 6 becomes your comfortable pace instead of level 4.
- You recover faster. Your breathing settles within a minute or two of finishing rather than five.
- Real stairs feel different. The flight up to your flat stops being an event. This is the one that actually matters in daily life.
- You last longer at the same level. Twenty-five or thirty minutes at the pace that used to be your limit.
One honest warning about the floor number. Many machines display floors climbed, and the count is generous and varies between brands, so do not compare your floors against someone else on a different machine. Compare your own sessions on the same machine and you will get a much truer picture.
Fitting it into your week
| Day | Session |
|---|---|
| Monday | StairMaster steady, 20 to 25 minutes |
| Tuesday | Full body strength workout |
| Wednesday | Walk or rest |
| Thursday | StairMaster intervals, 20 minutes |
| Friday | Full body strength workout |
| Weekend | Longer walk, or a third StairMaster session if you feel good |
Two cardio sessions and two strength sessions is a genuinely good week for a beginner. If you want the strength side laid out for you, the full body workout for beginners fits neatly alongside this.
Frequently asked questions
What is a good StairMaster workout for beginners?
Start with 15 minutes: three minutes of warm-up at level 3, nine minutes steady at level 4 or 5, then three minutes of cool-down. Keep your hands off the rails the whole time. Build to 20 or 25 minutes before adding intervals.
What level should I use on the StairMaster?
Level 4 to 6 suits most beginners for steady work, and level 7 to 9 for short intervals once you have a few weeks behind you. The right level is the highest one you can hold while standing upright without gripping the handrails.
How long should I use the StairMaster to see results?
Two or three sessions a week of 20 to 25 minutes, kept up for six to eight weeks, is usually enough to notice better leg endurance and easier breathing on stairs. Visible body changes depend far more on your overall activity and eating.
Is 20 minutes on the StairMaster enough?
Yes. Twenty steady minutes with good posture is a solid cardio session, and it is more useful than 40 minutes spent leaning on the rails. Add time or intervals only once 20 minutes feels comfortable.
Why is the StairMaster so hard?
Because you lift your entire body weight onto a new step over and over, with no rest between steps the way there is when walking. The machine also keeps going at a set speed, so you cannot unconsciously slow down as you tire.
Should I hold the handrails on the StairMaster?
Only lightly, and only for balance. Leaning on the rails transfers weight to your arms and makes the workout much easier than the level suggests. If you cannot let go, lower the level until you can.
Does the StairMaster build glutes?
It builds leg and glute endurance, and taller steps with an upright posture involve the glutes more. For actual glute growth you also need strength exercises like hip thrusts and squats, since the machine mainly trains endurance.
Is the StairMaster good for belly fat?
No exercise burns fat from one area. The StairMaster is a strong calorie burner and a useful part of a plan, but losing belly fat comes from your overall energy balance, activity and consistency over months.
Source: NHS, Physical activity guidelines for adults aged 19 to 64