Jump Squats: How to Do Them Safely (Plus a Beginner Jump Squat Workout)
A jump squat is a bodyweight squat where you drive up hard enough to leave the ground, then land softly and sink straight back into the next squat. It trains your quads, glutes, hamstrings and calves, and because it’s explosive, it builds power and gets your heart rate up far faster than regular squats. The catch is that the landing matters just as much as the jump, and most beginners get that part wrong.
I avoided jump squats for a long time because the first few I tried made my knees feel rattled. It took me a while to realise it wasn’t the exercise that was the problem. I was landing with straight legs, loudly, like I was trying to dent the floor. Once I learned to land quietly and let my hips absorb the impact, they became one of my favourite exercises.
This guide walks you through exactly how to do a jump squat, how to tell if you’re ready for them, a five-step progression to build up safely, and a complete jump squat workout you can do at home.
At a glance
- Muscles worked: quads, glutes, hamstrings, calves, core
- Main benefits: leg power, fitness and a big effort in a short time
- Before you start: 15 clean bodyweight squats with no knee pain
- Beginner sets and reps: 3 sets of 5 to 8, full rest between sets
- How often: 1 to 2 times a week, not on back-to-back days
- The most important cue: land quietly, like you’re trying not to wake someone
- Equipment: none, but wear supportive shoes and use a non-slip surface
What a jump squat is (and why it’s different)
A regular squat is a strength exercise. You lower yourself under control and stand back up. A jump squat takes that same movement and turns the way up into an explosion. You’re trying to push the floor away so fast that your body leaves the ground.
That makes it a plyometric exercise. Plyometrics are movements where a muscle stretches quickly and then contracts powerfully, like a spring loading and releasing. Skipping, hopping and bounding are all plyometric. They train your muscles and tendons to produce force quickly, which is a different quality to plain strength.
In everyday life, that quick power is what helps you run for a bus, climb stairs two at a time or catch yourself when you trip. As we get older, we tend to lose power faster than strength, which is one reason explosive exercises are worth including once you’re ready for them.
Jump squat muscles worked
Jump squats work almost your entire lower body, plus your core, which has to keep your torso steady on every take-off and landing.
| Muscle | What it does in a jump squat |
|---|---|
| Quadriceps (front of thighs) | Straighten your knees to drive you up, and control the knee bend on landing |
| Glutes | Extend your hips powerfully and absorb force as you land |
| Hamstrings | Help extend the hips and protect the knees during landing |
| Calves | Give the final push off the floor through your toes and cushion the landing |
| Core | Keeps your spine steady so the power goes into the jump, not into a wobble |
If you want a deeper look at how the squat pattern works these muscles, my guide to what muscles squats work covers every variation, including the regular squat you’ll be building from.
Jump squat benefits
Here’s what jump squats are genuinely good for, without the exaggerated claims you’ll see in some places.
- Leg power. They train your muscles to produce force quickly, which carries over to running, sport and everyday movement.
- A lot of work in a short time. A few sets of jump squats raise your heart rate quickly, which makes them useful in circuits and HIIT sessions.
- Stronger legs without equipment. Once bodyweight squats get easy, jumping is one of the few ways to keep challenging your legs at home without weights.
- Tendons and bones get a useful challenge. Controlled impact activity is one of the things that helps keep bones strong, and gradually introducing it helps your tendons adapt too.
- Better landing mechanics. Learning to land softly and with your knees tracking over your toes is a skill that protects you in other activities.
- They’re fun. Honestly, that counts. Exercises you enjoy are exercises you keep doing.
About calories: jump squats do burn more energy per minute than regular squats because they’re harder, but you won’t do them for long enough for that to matter much on its own. If you’re curious about the numbers for a whole session, the calories burned calculator gives a realistic estimate.
Are you ready for jump squats?
This is the question I wish someone had asked me. Jump squats aren’t a beginner’s first exercise. They’re something to build toward. Before you start, run through this checklist.
- You can do 15 bodyweight squats in a row with good form, heels down, chest up and knees tracking over your toes
- You have no current knee, ankle, hip or lower back pain
- You’ve been doing regular leg exercise for at least three or four weeks
- You can do 20 calf raises without your ankles wobbling
- You can stand on one leg for 20 seconds without holding on
If you can’t tick all of those yet, that’s completely fine. Spend a few more weeks on the basics with my beginner leg workout at home, and come back. It will make your first jump squats much better.
If you’re carrying a lot of extra weight, have had a knee or ankle injury, are pregnant, or have been told to avoid high-impact exercise, stick with the low-impact alternatives further down, and check with your doctor or physiotherapist before adding jumping.
How to do a jump squat, step by step
- Set your stance. Stand with your feet about shoulder width apart, toes turned out slightly. Let your arms hang by your sides.
- Squat down. Push your hips back and bend your knees, lowering until your thighs are roughly parallel to the floor or a little higher. Swing your arms back as you go. Keep your chest up and your weight spread across your whole foot.
- Explode up. Drive through your feet and straighten your hips and knees fast, swinging your arms forwards and up. Push through the balls of your feet and toes as you leave the ground.
- Stay tall in the air. Keep your body straight and your legs relaxed. Don’t tuck your knees up.
- Land softly. Touch down on the balls of your feet first, then let your heels come down, and immediately bend your hips and knees to absorb the landing.
- Sink into the next rep. Let the landing flow straight into your next squat, or reset and pause if you’re doing single reps.
The whole movement should feel smooth and springy, not jerky. For your first few sessions, I’d strongly recommend doing each rep on its own: jump, land, stand up, reset, then jump again. That way every landing gets your full attention.
The landing matters more than the jump
Most jump squat injuries come from the landing, not the take-off. When you land, your legs have to absorb a force several times your body weight in a fraction of a second. If your knees are locked, that force travels straight into your joints. If your hips and knees bend, your muscles take it instead.
Three cues that helped me:
- Land quietly. If your landing is loud, it’s too stiff. Imagine there’s a sleeping baby in the next room.
- Land in the same place you took off. Drifting forwards usually means your knees are pushing too far ahead of your toes.
- Knees out, not in. Your knees should point the same way as your toes. If they cave inwards when you land, make the jump smaller until they don’t.
A good test: film a few reps on your phone from the front. Watch your knees on the landing. If they collapse inwards, that’s your cue to go back a step in the progression.
Common jump squat mistakes
| Mistake | Why it’s a problem | The fix |
|---|---|---|
| Landing with straight legs | Sends impact straight into knees and hips | Bend hips and knees as your feet touch down |
| Knees caving inwards | Strains the inside of the knee | Smaller jumps, think “knees out” on every landing |
| Going for maximum height | Harder landings and faster fatigue | Aim for a moderate, controlled jump |
| Heels lifting in the squat | Shifts load onto the knees | Sit your hips back and keep weight across the whole foot |
| Rounding the back | Loses power and stresses the lower back | Chest up, brace your core before each rep |
| Doing too many reps | Form falls apart when you’re tired | Stop each set while the reps are still crisp |
| Jumping on a hard, slippery floor | Harsh impact and a risk of sliding | Use a mat on carpet or grass, wear trainers |
A 5-step jump squat progression
If jump squats are new to you, don’t just start jumping. Work through these stages, spending at least a week or two on each one. Move on only when the current stage feels easy and your joints feel fine the next day.
| Stage | Exercise | How to do it | Move on when |
|---|---|---|---|
| 1 | Bodyweight squat | Slow and controlled, full range | 3 sets of 15 feel easy |
| 2 | Squat to calf raise | Stand up from the squat and rise onto your toes at the top | 3 sets of 12 with good balance |
| 3 | Landing drill | Rise onto your toes, drop your heels and sink straight into a squat, holding the bottom for 2 seconds | Landings are quiet and knees stay in line |
| 4 | Mini jump squat | A small jump, just a few centimetres off the floor, one rep at a time | 3 sets of 8 with soft landings |
| 5 | Full jump squat | A moderate jump with full arm swing, single reps first, then continuous | 3 sets of 8 continuous reps with good form |
Stage 3 is the one people skip, and it’s the most valuable. You’re practising the landing without the jump, which teaches your body how to absorb force before you give it any real force to absorb.
Shoes, surface and space
Where you do jump squats matters more than people think, especially at home.
- Wear trainers. Cushioned, supportive shoes take some of the sting out of each landing. Bare feet or socks on a hard floor make every rep harsher, and socks on a smooth floor are a slipping hazard.
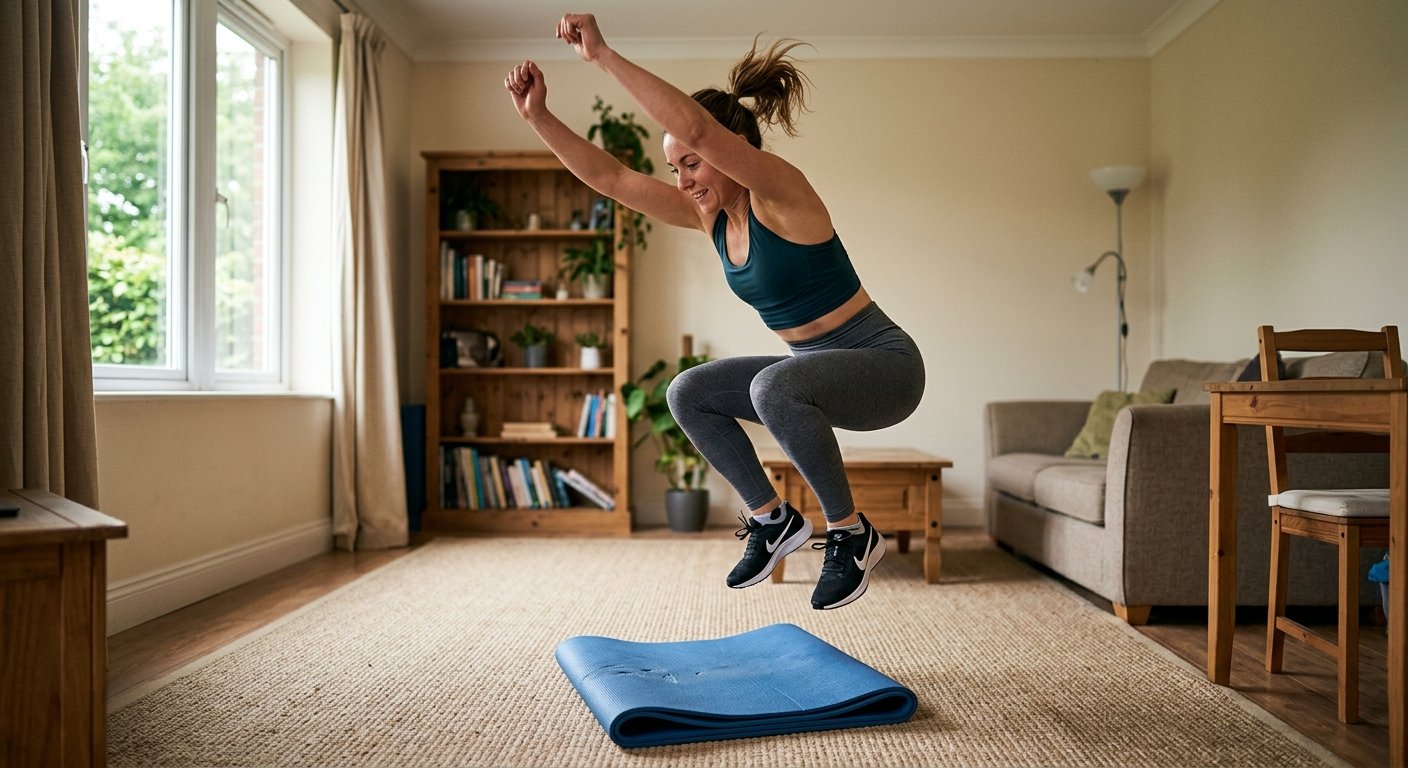
- Pick a forgiving surface. Carpet, a thick exercise mat, grass or a rubber gym floor are all good. Concrete and tiled floors are the worst options.
- Check your ceiling and surroundings. It sounds obvious, but low light fittings, shelves and furniture corners have caught out more than one person doing jumps in a living room.
- Think about the neighbours. If you live in a flat, soft landings aren’t just good technique. They’re good manners. If you still can’t jump without disturbing people below, the squat to calf raise gives you most of the benefit silently.
- Clear a space about two metres square. You shouldn’t travel far, but it’s worth having room if you drift.
I do mine on a folded yoga mat on the living room carpet, in trainers, and they’re quiet enough that nobody downstairs has ever complained.
A beginner jump squat workout
Here are three workouts, depending on where you are. Always start with five minutes of warm-up, like marching on the spot, bodyweight squats and leg swings. My full warm-up routine works well before this.
Workout 1: Jump squat foundations (about 20 minutes)
For anyone on stages 3 or 4 of the progression.
| Exercise | Sets | Reps | Rest |
|---|---|---|---|
| Bodyweight squats | 3 | 12 | 60 seconds |
| Landing drill | 3 | 6 | 60 seconds |
| Mini jump squats (single reps) | 3 | 5 | 90 seconds |
| Glute bridges | 3 | 15 | 45 seconds |
| Calf raises | 2 | 20 | 45 seconds |
Workout 2: Jump squat leg workout (about 25 minutes)
For anyone comfortable with full jump squats. The jump squats go first, while your legs are fresh, because power exercises need you at your best.
| Exercise | Sets | Reps | Rest |
|---|---|---|---|
| Jump squats | 4 | 6 | 90 seconds |
| Reverse lunges | 3 | 8 per leg | 75 seconds |
| Bodyweight squats with a 3-second lowering | 3 | 10 | 60 seconds |
| Glute bridges | 3 | 15 | 45 seconds |
| Wall sit | 2 | 30 to 45 seconds | 60 seconds |
Workout 3: Jump squat conditioning circuit (about 15 minutes)
A short, sweaty session. Do each exercise for the time shown, move straight to the next, and rest for 90 seconds after each round. Do 3 to 4 rounds.
| Exercise | Work time |
|---|---|
| Jump squats | 20 seconds |
| Marching or walking on the spot | 20 seconds |
| Push-ups (any level) | 30 seconds |
| Glute bridges | 30 seconds |
| Rest | 90 seconds |
This one works well as a stand-alone session on a busy day or as a finisher after a strength workout. If you like this style, my HIIT workout for beginners at home has more circuits built the same way.
How many jump squats should you do?
Fewer than you think. Jump squats are about quality, not quantity. The moment your jumps get lower and your landings get louder, you’ve stopped training power and started training bad habits.
| Level | Sets | Reps per set | Rest | Sessions per week |
|---|---|---|---|---|
| Beginner | 3 | 5 to 8, single reps | 90 seconds | 1 to 2 |
| Intermediate | 3 to 4 | 8 to 10, continuous | 90 seconds | 2 |
| In a conditioning circuit | 3 to 4 rounds | 20 to 30 seconds of work | As programmed | 1 to 2 |
A total of 20 to 40 good jump squats in a session is plenty for most people. Doing 100 jump squats for a challenge is a good way to end up with sore knees and not much else.
Leave at least 48 hours between sessions that include jumping, so your tendons get time to adapt. Tendons adapt more slowly than muscles, which is why your legs might feel ready to do more before your knees are.
Are jump squats bad for your knees?
For healthy knees, done with good form and built up gradually, no. In fact, learning to land well can make your knees more resilient. The problems come from doing too much too soon, landing stiff-legged, or letting your knees collapse inwards.
That said, jump squats aren’t for everyone, and it’s worth being honest about that. If you already have knee pain, arthritis, a past ligament injury, or you’re significantly overweight, the impact can aggravate things. In those cases, the alternatives below will build strong legs without the jumping. My guide to low-impact workouts for beginners is a good place to start.
A few signs to stop and reassess:
- Sharp pain in or around the kneecap during or after jumping
- Knee pain that’s worse the next morning
- Swelling around the knee
- A feeling that the knee is unstable or giving way
Low-impact jump squat alternatives
If jumping isn’t right for you right now, these give you a lot of the same benefits.
- Squat to calf raise: the same up-and-down pattern, finishing on your toes instead of leaving the ground
- Fast bodyweight squats: lower slowly, then stand up as fast as you can
- Step-ups: onto a low, sturdy step, driving through the front leg
- Squat pulses: small, quick movements near the bottom of the squat
- Glute bridges and hip thrusts: great for glute strength with zero impact. My guide on glute bridges vs hip thrusts explains the difference
- Single leg squats to a chair: a strength challenge without impact. The single leg squat progression walks you through it
Jump squats vs regular squats
| Regular squat | Jump squat | |
|---|---|---|
| Main quality trained | Strength and muscle endurance | Power and speed |
| Impact | None | Moderate to high |
| Heart rate | Moderate | High |
| Reps per set | 10 to 20 | 5 to 10 |
| Best for | Everyone, including total beginners | People with a solid squat and healthy joints |
| Skill needed | Low | Moderate, mostly in the landing |
You don’t have to choose one. Regular squats build the base that makes jump squats safe, and jump squats add something regular squats can’t. The best leg workouts often use both.
Adding jump squats to your week
Here’s a simple way to include jump squats without overdoing it.
| Day | Session |
|---|---|
| Monday | Leg workout with jump squats first |
| Tuesday | Upper body or a walk |
| Wednesday | Rest or gentle stretching |
| Thursday | Full body workout (no jumping) |
| Friday | Jump squat conditioning circuit |
| Weekend | Walk, bike ride or rest |
If you’re following a plan like the 30-day beginner home workout challenge, save jump squats for the second half, once your legs have had a few weeks to get stronger.
Frequently asked questions
What muscles do jump squats work?
Jump squats work your quadriceps, glutes, hamstrings and calves, with your core working to keep your torso steady. Because they’re explosive, they also train your muscles and tendons to produce force quickly, which regular squats don’t do as much.
How many jump squats should a beginner do?
Start with 3 sets of 5 to 8 single reps, resting 90 seconds between sets, once or twice a week. Stop each set while your jumps are still high and your landings are quiet. Around 20 to 30 good reps in a session is plenty.
Are jump squats good for losing belly fat?
No exercise burns fat from one specific area. Jump squats burn more calories per minute than regular squats and are useful in circuits, but losing belly fat comes down to your overall activity, your eating and consistency over time.
Are jump squats bad for your knees?
Not for healthy knees when you use good form and build up gradually. Land softly with your hips and knees bending and your knees in line with your toes. If you already have knee pain or an injury, choose low-impact alternatives and get advice first.
Should jump squats be done every day?
No. Jumping puts stress on your tendons and joints, which need time to adapt. Do jump squats once or twice a week with at least 48 hours between sessions.
How deep should I squat before jumping?
For most people, lowering until your thighs are roughly parallel to the floor or slightly higher works well. Going too deep slows you down and makes the jump harder to control, while barely bending limits the power you can produce.
What is the difference between jump squats and squat jumps?
They are the same exercise. Some people use squat jumps to describe single reps with a pause between them and jump squats for continuous reps, but both names refer to a squat followed by an explosive jump.
What can I do instead of jump squats?
Good low-impact alternatives include squat to calf raises, fast bodyweight squats, step-ups, squat pulses and glute bridges. They build similar strength and some power without the impact of jumping.
Source: NHS, Physical activity guidelines for adults aged 19 to 64