Transverse Abdominis Exercises: 12 Moves for Your Deep Core
The transverse abdominis is the muscle almost nobody trains on purpose, partly because you cannot see it and partly because it does not do anything dramatic. It does not flex your spine or produce a visible six pack. It wraps horizontally around your midsection like a corset and squeezes inwards, which sounds underwhelming until you understand that this is what stabilises your spine before almost every other movement you make.
If you have lower back pain that comes and goes, a stomach that pushes outwards despite being reasonably lean, or a core that feels strong in a plank but gives out when you carry something heavy, this is usually the muscle involved.
I want to be upfront about one thing. A lot of writing about the transverse abdominis, often shortened to TVA or TA, overstates what it does. It is not a magic muscle that fixes back pain on its own, and drawing your belly button in is not a cure for anything. What it is, is an underused part of a system, and training it properly makes the rest of your core work better.
At a glance
- The transverse abdominis is the deepest abdominal layer, wrapping horizontally around your midsection
- It contracts before you move your arms or legs, stabilising the spine in advance
- Training it needs tension and breathing, not crunches
- Twelve exercises below across three levels, from activation to loaded stability
- Two to four short sessions a week works better than one long one
- Specific guidance included for postpartum training and abdominal separation
What the transverse abdominis actually is
Your abdominal wall has four layers on each side. From the surface inwards:
| Layer | Muscle | Fibre direction | Main job |
|---|---|---|---|
| Surface, front | Rectus abdominis | Vertical | Flexes the spine, the visible six pack |
| Second | External oblique | Diagonal, downward | Rotation and side bending |
| Third | Internal oblique | Diagonal, upward | Rotation and side bending |
| Deepest | Transverse abdominis | Horizontal | Compresses the abdomen, stabilises the spine |
The horizontal fibre direction is the whole story. Because the fibres run sideways around your body rather than up and down, contracting them does not bend you anywhere. It tightens, like pulling a belt in. That raises the pressure inside your abdomen, which stiffens the spine from the inside.
The transverse abdominis also works as part of a group, sometimes called the inner unit, with three other structures:
- The diaphragm above, which is why breathing and deep core function are linked
- The pelvic floor below
- The multifidus, small muscles running along the spine, behind
These four contract together as a coordinated system. This is why breathing cues appear in every good TVA exercise, and why pelvic floor and deep core training overlap so much.
Why it matters, without the overstatement
The genuinely useful benefits:
- It fires before you move. Research on trunk stability has repeatedly found that the transverse abdominis activates fractionally before limb movement in people without back pain, and that this timing is often delayed in people with chronic low back pain
- It stabilises under load. Carrying, lifting, pushing a heavy door, picking a child up off the floor
- It supports posture by holding the trunk together rather than letting the ribs drift away from the pelvis
- It helps flatten the lower abdomen in the specific sense of improving the muscle’s resting tone, which is different from losing fat
- It works with the pelvic floor, which matters for continence and for postpartum recovery
One honest caveat. The evidence that specifically isolating the transverse abdominis fixes back pain is weaker than most fitness articles imply. General exercise, strength training and staying active all perform well for back pain. Treat deep core work as one useful component rather than a cure.
How to actually activate it
This is the part people get wrong, and it is worth doing properly before any of the exercises below.
The abdominal drawing-in manoeuvre
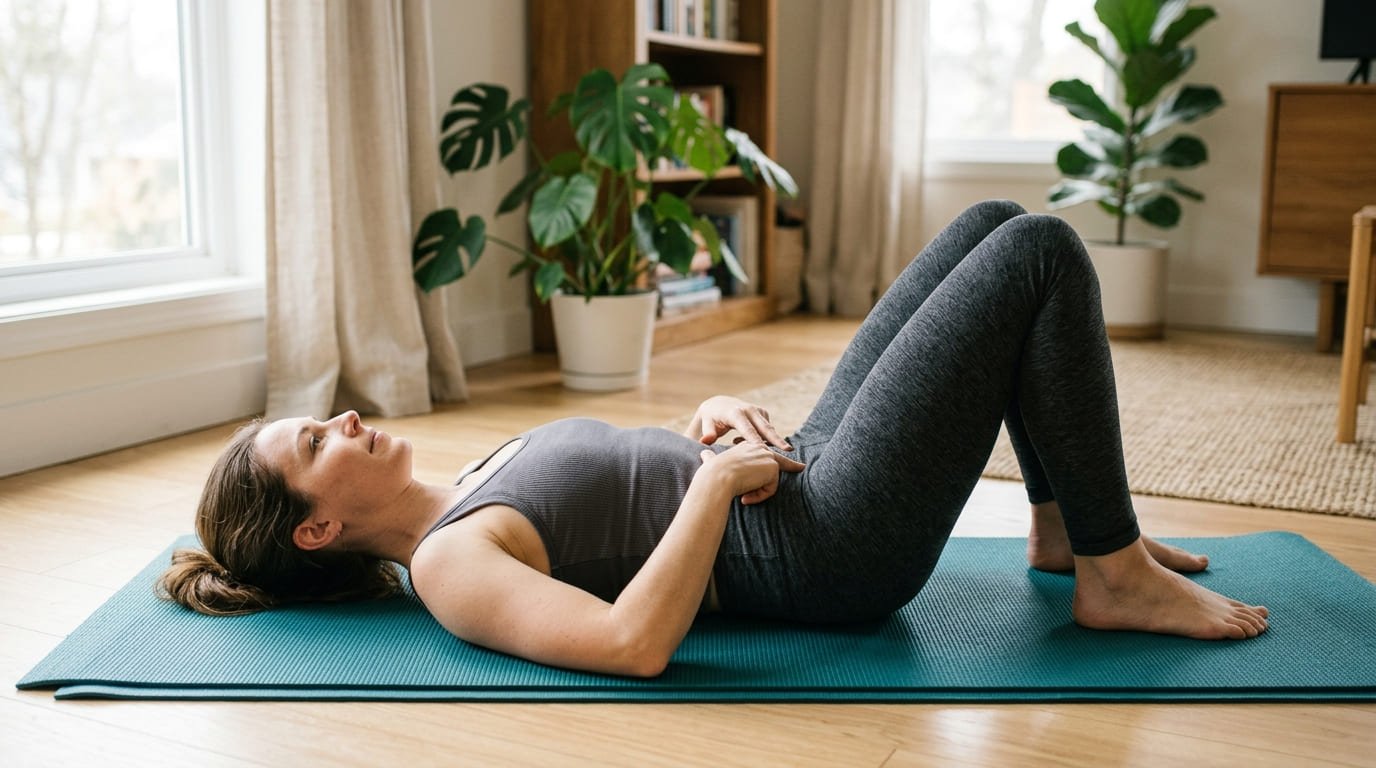
- Lie on your back with knees bent and feet flat on the floor
- Place your fingertips just inside your hip bones, about 2 cm in and 2 cm down
- Breathe in normally, letting your ribs expand sideways rather than your chest lifting
- As you breathe out, gently draw your lower abdomen inwards and upwards, as if narrowing your waist
- You should feel a light tension develop under your fingertips, not a hard bulge
- Hold for 5 to 10 seconds while breathing normally, then release
The three most common errors:
- Sucking your stomach in and holding your breath. If you cannot talk during the hold, you are bracing your whole trunk rather than isolating the deep layer
- Tilting your pelvis. The fibres are horizontal, so your pelvis and ribs should barely move at all
- Pushing outwards. If your abdomen bulges under your fingers, you are bearing down rather than drawing in, which increases pressure downwards onto the pelvic floor
Aim for roughly 30 percent effort. This is a low-intensity, endurance-based muscle, not one you train by straining.
Drawing in versus bracing: which do you need?
This is a genuine point of confusion, and none of the competing articles I read explain it clearly.
| Technique | What you do | Effort level | When to use it |
|---|---|---|---|
| Drawing in | Narrow the waist, draw the lower abdomen in and up | About 30 percent | Learning activation, rehab, postpartum, low-load daily movement |
| Bracing | Tighten the whole abdominal wall as if expecting a punch | 60 to 100 percent | Heavy lifting, squats, deadlifts, carries |
Drawing in teaches you to find and control the deep layer. Bracing is what you actually use under heavy load, because a heavy squat needs the whole abdominal wall, not just one layer.
The sequence that works: learn drawing in first so you can feel the muscle, then build up to bracing under load. People who only ever practise drawing in never develop real-world stability. People who only brace often never learn to access the deep layer at all.
12 transverse abdominis exercises
Organised into three levels. Do not skip level one, even if it looks easy. If you cannot hold the activation, the level two and three exercises become ordinary core exercises rather than deep core ones.
Level 1: activation
1. Abdominal drawing-in manoeuvre
As described above, lying on your back.
- Sets: 10 holds of 10 seconds, breathing throughout
- When to progress: when you can hold for 10 seconds while talking normally
2. Diaphragmatic breathing
Lie with one hand on your chest and one on your abdomen. Breathe in so that the lower hand rises and the upper one stays still, and feel your lower ribs widen sideways. Breathe out slowly and fully, feeling the deep abdominals engage naturally at the end of the exhale.
- Time: 2 to 3 minutes
- Why it matters: a full exhale is the most reliable way to feel the transverse abdominis switch on without consciously forcing it
3. Dead bug
On your back, arms straight up and knees bent at 90 degrees over your hips. Draw in gently, press your lower back lightly toward the floor, then lower one arm and the opposite leg toward the floor. Stop before your back arches. Return and swap sides.
- Reps: 3 sets of 8 each side
- Key point: the moment your lower back lifts off the floor, you have gone past your current capacity. Shorten the range
4. Heel slides
On your back with knees bent. Draw in, then slowly slide one heel along the floor until the leg is straight, keeping your pelvis completely still. Slide it back.
- Reps: 3 sets of 8 each leg
- Cue: imagine balancing a glass of water on your pelvis
Level 2: stability
5. Bird dog
On hands and knees. Draw in, then extend one arm forward and the opposite leg back until both are level with your torso. Hold for 3 seconds, return, and swap.
- Reps: 3 sets of 8 each side
- Common mistake: lifting the leg too high, which arches the lower back. Level is high enough
6. Low ab march
Same start as the dead bug, feet up in tabletop. Draw in, then lower one foot to tap the floor and bring it back, keeping your pelvis still.
- Reps: 3 sets of 10 each side
7. Side plank, knees or feet
On your side, propped on your forearm, either from the knees or the feet. Lift your hips so your body forms a straight line and hold.
- Time: 3 holds of 20 to 40 seconds each side
- Why it belongs here: side planks load the obliques and the deep layer together, which is how they work in real life
8. Bear hold
On hands and knees with toes tucked. Draw in, then lift your knees 2 to 3 cm off the floor and hold. Your back stays flat.
- Time: 3 holds of 20 to 30 seconds
- Tip: 2 cm is enough. Lifting higher shifts the work to your hip flexors
Level 3: loaded stability
9. Pallof press
Anchor a resistance band at chest height and stand side on, holding it at your chest with both hands. Press your hands straight out in front of you and resist the band’s pull to rotate you. Bring the hands back.
- Reps: 3 sets of 10 each side
- Why it is the best exercise here: it loads the deep core specifically by asking it to resist rotation, which is exactly the job it does in real life
10. Suitcase carry
Hold a single heavy weight in one hand and walk, keeping your torso completely upright and refusing to lean sideways.
- Time: 3 walks of 30 seconds each side
- Loading: heavier than feels necessary. This is a strength exercise, not an endurance one
11. Stir the pot
Forearms on a stability ball in a plank position. Draw in, then make small circles with your forearms while your torso stays perfectly still.
- Reps: 3 sets of 8 circles each direction
- No ball? Do slow plank shoulder taps instead
12. Ab wheel rollout, or a kneeling towel slide
From your knees, roll forward as far as you can while keeping your lower back from arching, then pull back. A towel on a hard floor under your hands works if you have no wheel.
- Reps: 3 sets of 6 to 10
- Warning: only attempt this once level 2 is comfortable. Going too far too soon is a common cause of lower back strain
A 6-week deep core plan
None of the competing articles give a progression timeline, which is why most people do the same three exercises indefinitely. Here is the plan.
| Weeks | Sessions per week | Focus | Session content |
|---|---|---|---|
| Weeks 1 to 2 | 4 short sessions | Activation | Drawing in, breathing, dead bug, heel slides, 8 to 10 minutes |
| Weeks 3 to 4 | 3 sessions | Stability | Bird dog, low ab march, side plank, bear hold, 12 to 15 minutes |
| Weeks 5 to 6 | 3 sessions | Loaded stability | Pallof press, suitcase carry, stir the pot, plus one level 2 exercise, 15 to 20 minutes |
| Ongoing | 2 sessions | Maintenance | One exercise from each level, added to your normal training |
Short and frequent beats long and rare for this muscle. Ten minutes four times a week in the first fortnight will teach you activation far better than forty minutes once.
How to tell it is working:
- You can hold the drawing-in position while breathing and talking
- Dead bugs no longer make your lower back lift
- Carrying shopping in one hand no longer makes you lean
- A plank feels like it is working your abdomen rather than your shoulders and lower back
- Everyday bending and lifting feels more controlled
Postpartum and abdominal separation
This section matters, and most general TVA articles leave it out entirely.
During pregnancy the abdominal wall stretches and the linea alba, the connective tissue running down the middle, thins and widens. Some degree of separation, called diastasis recti, is normal at the end of pregnancy and resolves substantially in the months afterwards for many people.
How to check: lie on your back with knees bent, place your fingers just above and below your belly button, and lift your head slightly. Feel for a gap between the two sides of the rectus abdominis, and note both the width and whether the tissue feels firm or soft when you press.
What to prioritise:
- Diaphragmatic breathing and drawing in, starting gently and early
- Level 1 exercises, particularly heel slides and modified dead bugs
- Pelvic floor work alongside the deep core, since they function together
- Progression based on control rather than a calendar
What to be cautious with early on:
- Full crunches and sit-ups, which load the separation directly
- Full planks before the deep core can hold position
- Anything that makes your abdomen dome or cone outwards down the midline
- Heavy lifting before you can maintain activation under lighter load
The doming test is the most useful practical guide: if your abdomen pushes up into a visible ridge during an exercise, that exercise is currently too advanced. Regress it and build up.
Anyone postpartum, and particularly anyone with a significant separation, ongoing pain or any leaking, should see a pelvic health physiotherapist. This is the one area where individual assessment genuinely matters more than any article.
If you have back pain
Deep core work is often recommended for back pain, and it can help, but the framing matters.
- Start with pain-free movements only. If an exercise hurts, regress it rather than pushing through
- Drawing in before you move is the practical skill, more than any single exercise
- Do not expect isolated TVA work alone to fix it. The evidence favours general exercise and gradually building overall strength
- Keep moving. Prolonged rest is one of the least effective approaches to ordinary back pain
- Get it assessed if the pain is severe, radiates down a leg, follows an injury, or comes with numbness, weakness or changes in bladder or bowel function
Seven mistakes people make
- Holding your breath. If you cannot talk, you are bracing, not activating
- Pulling in too hard. Around 30 percent effort is the target for activation work
- Bearing down instead of drawing in, which pushes pressure onto the pelvic floor and is the opposite of what you want
- Jumping straight to planks and rollouts without being able to hold activation
- Expecting a flat stomach from this alone. Improved muscle tone helps, but how flat your abdomen looks is mostly determined by body fat
- Only doing floor exercises. Carries and Pallof presses are where the real-world stability is built
- Training it once a week. This is an endurance-oriented stabiliser and responds to frequency
Will this flatten your stomach?
Partly, and it is worth being precise about how.
Strengthening the transverse abdominis improves the resting tension of the abdominal wall, which can genuinely reduce the degree to which the lower abdomen pushes forward. People often notice their waist measurement drops slightly within a few weeks without any change in body fat.
What it will not do is remove fat from your midsection. Fat loss comes from a sustained calorie deficit and is distributed across your whole body in a pattern largely set by genetics. If visible abdominal definition is the goal, the article on what body fat percentage abs show at covers the numbers honestly.
For surface-level ab training to sit alongside this deep core work, our beginner core workout covers the rectus abdominis and obliques, and oblique exercises covers the rotational work that pairs naturally with Pallof presses.
The bottom line
The transverse abdominis is not a magic muscle, but it is the one most people have never deliberately trained, and that gap shows up as a core that feels fine on the floor and unreliable under load.
Learn the activation first with your fingers on your abdomen so you can actually feel it. Keep the effort low and never hold your breath. Spend two weeks on level one before moving on, then build toward Pallof presses and suitcase carries, which are where deep core strength becomes real-world stability. Short sessions, three or four times a week, beat one long one. And if you are postpartum or have ongoing back pain, get individual guidance rather than relying on a general plan.
Frequently asked questions
What are the best transverse abdominis exercises?
The abdominal drawing-in manoeuvre for learning activation, dead bugs and bird dogs for stability, and Pallof presses and suitcase carries for loaded, real-world strength. Pallof presses are arguably the single most useful, because they train the deep core to resist rotation, which is its primary job during everyday movement.
How do I know if my transverse abdominis is working?
Place your fingertips just inside your hip bones, about 2 cm in and down, then breathe out and gently draw your lower abdomen in and up. You should feel a light tension develop under your fingers. A hard bulge means you are bracing the whole wall, and an outward push means you are bearing down instead.
How often should I train my deep core?
Two to four short sessions a week. The transverse abdominis is an endurance-oriented stabiliser, so frequent short sessions of 10 to 20 minutes work better than one long session. In the first two weeks of learning activation, four short sessions a week produces noticeably faster progress.
Do planks work the transverse abdominis?
Yes, but only if you can already hold the activation. A plank performed with the lower back sagging and the abdomen relaxed mostly loads the shoulders and lumbar spine. Learn the drawing-in manoeuvre first, then apply it during planks, and the exercise becomes far more effective.
Can transverse abdominis exercises fix back pain?
They can help as part of a broader approach, but claims that isolated deep core work cures back pain go beyond the evidence. Research shows deep core activation timing is often delayed in people with chronic back pain, but general exercise and overall strength training perform well for back pain too. Treat it as one component.
Will training my transverse abdominis flatten my stomach?
It improves the resting tone of the abdominal wall, which can genuinely reduce how much the lower abdomen pushes forward, and some people see a small drop in waist measurement within a few weeks. It does not remove fat, however. Visible abdominal definition is determined mostly by body fat percentage.
Is it safe to do transverse abdominis exercises postpartum?
Gentle activation work such as diaphragmatic breathing, drawing in and heel slides is usually appropriate early, while crunches, sit-ups and full planks are best delayed. The practical guide is doming: if your abdomen pushes into a visible ridge during an exercise, regress it. See a pelvic health physiotherapist for individual assessment.
What is the difference between drawing in and bracing?
Drawing in is a gentle, roughly 30 percent effort that narrows the waist and isolates the deep layer, used for learning activation and low-load movement. Bracing is a much harder contraction of the whole abdominal wall, used for heavy lifting. Learn drawing in first, then build to bracing under load.